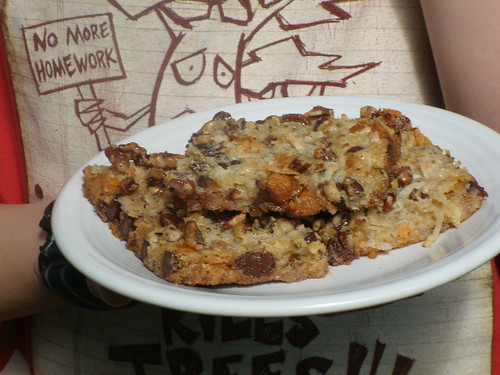
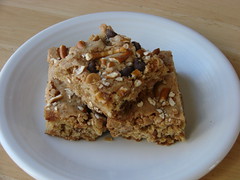
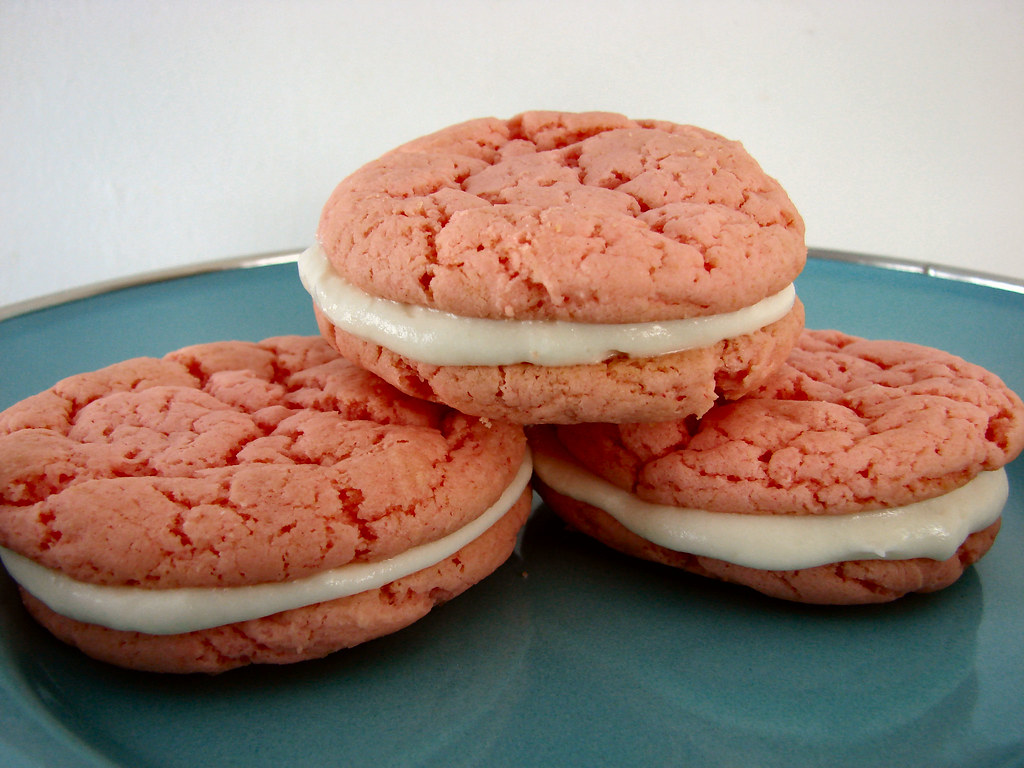
Showing posts with label recipe. Show all posts

Wednesday, December 11, 2013

Stroopwafels

My husbands family is Dutch, so when my son decided which language to take in high school, he chose Dutch. As part of his learning Dutch he had to make a food that was also Dutch. So of course my son doesn't pick something to make that I have all the ingredients/materials to make in the house. He picks something that I have to buy an iron to make. So we purchased a pizzelle iron to make our stroopwafels. The first batch was meh. The other batches have proceeded to get better and now I think we are near perfection! (At least according to our tastes)

So here they are

They are a delicious crisp cookie filled with a honey caramel. You can place them on your warm coffee or tea and it warms the caramel and makes them gooey and delicious! You can make them in a waffle cone iron or a pizzelle iron like we did.

Stroopwafels
dough
4 1/2 cups all purpose flour
2 tsp active dry yeast
1 tsp ground cinnamon
3/4 c sugar
1 stick unsalted butter
1/2 c warm water (slightly above body temp)
2 large eggs
dash of salt

In a mixer bowl; add flour, yeast, cinnamon, & sugar, cut in flour with your hands until it resembles small pellets. Place mixer bowl on mixer and on low slowly pour in the warm water and allow the dough to start coming together. Add eggs one at a time. Add in the dash of salt and knead dough until it's a firm and cohesive dough.

Cover with a damp towel or cling wrap and rest for 30 minutes.

caramel
1 stick of butter
1/2 c brown sugar
1/2 c sugar
1 tsp cinnamon
2 T Karo syrup (I used light)
1 T honey
1 T maple syrup
1 T vanilla

Melt butter and sugar stirring slowly over low heat. Add cinnamon, honey and syrups and continue to stir until the caramel comes together and slowly bubbles. Keep stirring because at this stage it's easy to burn. Keep stirring until sugar is all dissolved and caramel is creamy. It will be HOT! Keep caramel warm.

Divide the dough into 40 equal pieces. Roll them into small marbles and cover with a damp cloth so they don't dry out while baking other pieces.

Heat your pizzelle iron or waffle cone machine according to instructions. Place dough ball in the iron, press down and bake each cookie/waffle for approximately 40 seconds. Check to see if browned and puffed up a little. Remove from machine and place it on a flat surface.

*Working quickly while the cookie is hot and pliable (when it cools it will break on you.)

Place your hand on top of the cookie and slice it horizontally in two with a sharp non-serrated knife. (I had to use a towel/clean pot holder because it was too hot.) Because of the yeast it puffs up a bit to make a spot to cut.

Immediately smear a bit of caramel on top of the bottom cookie. Replace the top and gently push down so the caramel spreads. Let cool on a rack. Then do the next dough ball.*

NOTE: * This is the traditional way to do it. But this is not how I did i;. my pizzelle iron has 3 cookie spots. I cooked 2 at a time [3 I couldn't quite do quick enough] set on 3.5. After 40 seconds I took them out and using a towel to protect my hand I cut them horizontally. I then set them aside (I pressed them gently to encourage them to stay flat. After I cooked all of my cookies. I then made my caramel. When my caramel was hot I reopened my cookies and spread the caramel on the bottom cookie half, then smooshed them together. They held up just as well as the traditional way, but was easier for me to do by myself.

Monday, April 16, 2012

Menu Plan 4/16/2012 - Yogurt slow cooker recipe

I have to admit planning meals has become quite a chore. My husband has been gone since the first of the year only coming home for about a day each weekend. My boys are all tween/teens and are spending far less time home at meal time. We do try to eat together every night, but honestly it's becoming far more of starting with 2 or three of us, then some leaving early and others coming in late. I am also realizing I'm in real trouble when the boys move out. I cook for an army! I cook for extra leftovers, lunches, freezing, etc.. I really don't need to be planning as many meals as I do. We have been consistently skipping at least one of these meals if not two just trying to use up enough leftovers. So here's the plan.

Monday- Chicken Ravioli with Alfredo sauce, lettuce salads, garlic bread
Tuesday- Swedish Meatballs, steamed green beans with almonds, garlic noodles
Wednesday- Chicken Lo Mein w/Vegetable Eggrolls
Thursday- Leftovers
Friday- Kids & hubby gone, out with friends
Saturday- Kids & hubby gone probably junk food!
Sunday- Cranberry Kale, Macaroni and cheese (with bean puree)

I am planning on making some cookies this week to freeze for the boys' lunches. I haven't done that in awhile, and they've noticed!
Last week's biggest success was I made yogurt for the first time. I made it in the crock pot, and I will NEVER buy yogurt again! It's amazing. The recipe I used was from a website that I can't seem to find at the moment (I will update when I do find it.) But it couldn't have been easier.

Slow cooker Yogurt

Slow cooker Yogurt
Large slow cooker - Mine is 7qt.
1 gallon whole milk
1 cup yogurt (you need this for the bacteria, I also read you can use whey also)Plain with live cultures and no added pectin
Coffee filters or something for straining (I have special flour sack towels for this)
Large towel (I used bathtowel)

Sweeteners/Vanilla etc.. if desired (I made plain, because that's what I buy)

Place milk in slow cooker cook on low for 2.5 hours.
Turn off and unplug for 3 hours.
Whisk in 1 cup of yogurt, cover slow cooker with large towel for 8 hours or overnight. Strain whey from yogurt. I put my flour sack towel in a colander over a large bowl. It took some work and time. I had to scrape it frequently to get the whey moving. I tried to use coffee filters, but they kept breaking, so I went to the towel. I made mine nice and thick, greek style.
It made 48oz thick yogurt and a large canning jar of whey. This can easily be halved (it was on the original recipe I used.) Times stay the same.

I am currently finding lots of things to do with whey. I've been throwing it in juice and smoothies. My kids are enjoying it because they love YoJ, but I never buy it for them, and they think the juice with whey tastes like YoJ.

The Prarie Homestead has lots of uses for whey. I'm working my way through them slowly.

Monday, February 13, 2012

Meal Plan Monday 2/13

Sausage Bean & Greens Soup by ezri_b
Sausage Bean & Greens Soup, a photo by ezri_b on Flickr.

Ok, so I normally meal plan once a week anyway, I figured why not share it here. I love getting ideas for my meal plan from other blogs, and it's a way for me to keep track of our eating habits.

Monday- Sausage Bean & Greens Soup (recipe below)

Tuesday- BBQ Chicken Legs with Roasted Beets

Wednesday- Reuben Ravioli (winging it, no recipe yet)

Thursday- Crustless Quiche

Friday- Homemade Pizzas

Saturday- Orange/Honey Chicken on rice

Sunday- Potluck at Church

Before I post the recipe I feel the need to explain how I cook. I don't follow recipes. I don't measure, and I rarely make the exact thing twice. I use what's in my fridge or garden. I taste and see if it needs a "little of this or a little of that." So all of these "recipes" are guidelines. Don't feel limited, just use what you have.

Sausage, Bean, & Greens Soup (sort of recipe) Serves: about 12 main dish
1 large diced onion
3 diced celery stalks
2 diced carrots
2 large handfuls of diced hearty greens (today I used beet greens, but I use kale frequently too)
1 T coconut oil (any oil/butter that you like works) * only if you go vegetarian or have a very low fat sausage
1 diced sausage (we had a large smoked beef sausage that I diced up, but I've used turkey sausage with great results.)
2 15 oz cans great northern beans drained and rinsed
48 oz chicken broth
2 T flour
1/4 c milk/cream *optional
salt and pepper
favorite herbs (I used thyme and marjoram)

Brown up you sausage in large pot, then set aside. Cook vegetables in drippings until soft (if you don't have drippings add a bit of oil/butter)
Once vegetables are soft add flour and cook on low. Add milk/cream and broth. Bring to a low boil. Add remaining ingredients. Continue cooking on low until everything is warm through.

This is great because you can use up pretty much any veggies you have laying around. Also if you have some leftover barley, rice, etc... go ahead and throw it in.

http://orgjunkie.com/blog

Thursday, June 16, 2011

Summer Activities

Well, summer has most definitely begun for us. We've already had our big camping week (since we couldn't find another week available all summer.) The big spawn got to bring some buddies along, as sort of an 8th grade graduation celebration.
camping levi caleb justin on aquaglide
Now summer school has begun with babysitting classes and my big spawn attending driver's ed classes (gulp!)
We always try to have some sort of family project through the summer too. Kind of a "keep your mind working" class of sorts. It's really hard to think of great activities for teen/pre-teen boys to do that they'll enjoy during summer and learn something. Well, some years are far more productive than other years, but I have a good feeling about this year. We're having a cooking class/cookbook writing class. The boys are really taking the lead on this which I think is awesome! They've come up with a bunch of recipes that we enjoy as a family and that are requested frequently. Then they are making the recipes, testing them, measuring carefully, writing out the recipe, typing it up, photographing the finished product and when summer is over we'll publish it as a cookbook.

We did our first submission today. Magic 7 layer bars. I honestly don't know where this recipe originated, we've made it forever and I know tons of others who do too. I would venture to guess it was on the back of some packaging. Anyway, here's what they wrote so far. They will be adding family anecdotes and such to it too later
cookbook magic bars
Magic 7 layer bars
4oz. of butter (that's a stick)
1 1/2 cups graham cracker crumbs
6 oz. of chocolate chips
6 oz of butter scotch chips
1 1/3 cups coconut
1 can of sweet and condensed milk
1 cup chopped pecans (optional, but Mom says we should to give it an ounce of nutrition)
Preheat oven to 350 degrees F.
Melt butter in a 9X13" pan. Sprinkle graham cracker crumbles over butter, mix well, pat it in to the pan with fork. Do this really hard so you get a nice crust. Top crumble crust with chocolate chips, butterscotch chips, and nuts. Then sprinkle coconut on top. Drizzle the sweet and condensed milk over the whole thing. Bake 25-30 min until browned a little on edges. Cool then cut into squares. Prep time: 5-10 min. Cook time 25-30 min.

I just copy and pasted what they typed. I'm not sure if I should leave in typos and spelling errors, or have them fix it. They're cute, but it is supposed to be teaching them something.

Wednesday, June 1, 2011

Stuffed Bread Loaf- Picnic Food

Summer is FINALLY here in Wisconsin. Not only does this mean we get to enjoy the outdoors so much more, it also means crazy late nights with baseball and soccer. Hey, I'm not complaining! I adore this weather and time of the year. The only problem is the food. I learned recently that I am pork intolerant. This sucks, but I have to just get used to it and move on. And make adjustments.
What food do they have at the local ballpark? Hotdogs (nearly all are pork or part pork,) brats (pork) and pizza (pepperoni and sausage... both pork.) Though we would indulge in these items occasionally (the nutrition just isn't there,) I really can no longer do that. Did I mention there is absolutely no fast food in my town? Oh, I didn't. Well, there isn't, so that isn't a quick option anyway. So now we must bring something. Which really is ok, the nutrition will be much better, but I will need to be creative and think ahead. So what to make?
stuffed bread
Here is the first travel supper of the season. Stuffed bread! It baked up wonderfully! Was super easy to make, and tasted good. I will make again, but I think I'll bump up the seasoning a bit more.

I started with Smitten Kitchen's bread without a timetable recipe
I stuck pretty close to the actual recipe she gave.
Then when she makes the baguette. I just filled in some yummy fillings before rolling.
This version was sauteed kale, carrots, mushrooms, onion, leek, garlic, broccoli, & red pepper. I sauteed it in a bit of butter and a splash of chicken broth. I seasoned it with thyme, marjoram, parsley, salt and lots of pepper.
stuffed bread pre roll
Then I covered it in Gruyere cheese and rolled it up. I brushed it with water and snipped some spots on top.

stuffed bread pre bake
I baked it on parchment paper. It came out golden. I let it sit a bit before I cut into it.
stuffed bread loaf
My husband and boys liked it alot. They all said it would have been better with bacon (again, I can't eat pork.) Really you could use any filling you wanted. Next time will probably be more of a pizza style or taco style one. This will travel really well though, and will definitely make it into our travel/picnic food rotation.

Do you have any great tried and true picnic recipes? I'd love to hear them!

Tuesday, January 5, 2010

Pictures

Some pictures from the last few months in no particular order.


Lore working his abs on the beach on Amelia Island FL


Amelia Island Florida. Levi and Liam looking for shells and Shark's teeth


The boys' favorite "Cookie" Peppermint Kisses. Recipe here

Advent calendar. Inspired by this post on Allsorts we fill it with activities. We did really great this year. We accomplished all of our tasks but one. We didn't get to gaze at the stars the night we wanted to because of clouds.

Chubby Hubby Bars (Inspired by Ben and Jerry's Ice Cream Flavor which is my hubby's favorite.) Recipe here
For Thanksgiving this year, we made a Thankful Tree. And we added to it all of November.
Veterans day skydiver at the school!

Making fresh pasta with my boys was way too much fun! This is Liam and his gloppy mess.
Here's Levi's mess before he got a nice ball going.

Sugar cookies are always fun.

My niece Clover's doll in progress. She has super curly blond hair and bright blue eyes, just like Clover does!

Wednesday, March 11, 2009

Ginger Molasses Cookies

I found out today that I had to make 3 dozen cookies for 4H. I wasn't sure what to do, I didn't have much time. I picked the cookie that has never failed me and the kids and hubby love. I've been making these cookies for years and always get compliments and requests for the recipe. I give them the recipe, and people say they never taste as good as mine. Well, there is a secret, and I'm going to share it with all of you today.


Ginger Molasses Cookies
Ingredients

1 1/2 stick unsalted butter, softened
1/2 cup dark brown sugar, packed
1/2 cup granulated sugar, plus 1/3 cup for rolling cookies
1 large egg
2 teaspoon vanilla extract
1/3 cup un-sulphured molasses
1 1/4 cups all-purpose flour
1 cup whole wheat flour
2 teaspoons baking soda
1/2 teaspoon salt
1 1/2 teaspoon ground cinnamon
1 teaspoon ground ginger
3/4 teaspoon ground cloves
1/8 teaspoon ground black pepper

Preheat oven to 375F.
Cream butter and sugars together until nice and fluffy, scraping down sides of bowl as needed.
Add egg, vanilla, & molasses and beat.
In a separate bowl combine flours, baking soda, salt, cinnamon, black pepper and cloves.
Combine wet ingredient mix with dry ingredient mix until well combined.
Place remaining 1/3 cup granulated sugar in shallow bowl. Scoop dough with small cookie scoop. Form into balls and roll in sugar. Place them on an ungreased baking sheets, spacing them about 2 inches apart. Bake for 10-13 minutes. You want to slightly under cook them, or they become quite hard. Let them cool on baking pan for about 3 minutes. Remove, from pan and let cook on a wire rack. These freeze well and pack well for shipping also the recipe is fine doubled.

Ok, so that's the recipe. It's good if you follow those directions, now here's the key to making them great.
You MUST use freshly ground cloves! I have a small mortar and pestle, but you could use a bowl and the back or a spoon or a spice grinder. It makes an enormous difference!

Yep, that's it, I know it sounds silly, and it really isn't a big deal, but it is a huge difference trust me. I hope you enjoy, if you make them let me know if you like them.

Tuesday, February 3, 2009

Black Bean Soup 2 Ways


This is my world famous Black Bean Soup... ok, I don’t know how famous it is, but I have a friend from Australia who loves it, he requests it every time he’s around. And he’s on the other side of the world. I also have a friend who told me she didn’t want baby gifts from me, she just wanted Black Bean Soup. My hubby and my boys love it and request it. So to me that says it’s pretty darn good.
It can be vegetarian quite easily. I use homemade Chicken stock, that’s what I prefer and I always have some in my freezer. You could just as easily use vegetable stock.
I don’t measure at all, so these are guesstimates. Start less, you can always add to taste.
Oh, and this makes a ton of soup, because it freezes like a dream!

Quick Way
2-3 Large Cans of Black Beans Drained & rinsed a bit
1 can refried beans (Vegetarian if you’re going that route)
1-2 boxes of Stock (Chicken or Vegetable) This is a preference thing. I like mine thicker, my kids like it thinner.
¼ cup dried minced onion
2 Tbsp Diced jalapeno or more if you like (use fresh, jarred, canned, whatever)
¼ cup chopped up red pepper (you could use from frozen)
~2 cloves of garlic minced (you can use the jar stuff)
cumin (I start with a good palm full)
~ 1-2 Tsp cayenne powder (depending on how hot you like it, that would be medium)
½ tsp chili powder
salt ( not much, canned beans tend to be salty, you can always add more)
Fresh Cilantro (I’m sorry I think this is a must & I use a ton!)
1 Tbsp Lime juice (optional I like it)
¼ cup Prepared Salsa/Pico (fresher the better though)

Optional Toppings
Fresh Cilantro
Sour Cream
Shredded Cheese
More Salsa
Tortilla Strips/Chips

Dump all of the ingredients in a big pot and cook on medium heat until it starts to bubble a bit, stirring occasionally. It should take about 20-30 minutes. Put in bowl, top if desired. Eat. Makes a ton, freeze extras if you want.


Cheaper Way
1-2 bags of dried black beans
1 can refried beans
8 cups or so of homemade stock (more if you like it thinner, less if you like it thicker)
¼ cup diced onion
¼ cup diced red pepper
2 jalapenos diced
2 cloves garlic minced
A palm full of dried cumin
1-2 Tsp Cayenne powder depending on how hot you like it
½ tsp chili powder
salt (Usually about 2-3 Tablespoons worth, but I don’t salt my stock or beans, so it needs it)
Fresh Cilantro (LOTS!)
Juice of 1 lime (optional, I like it, hubby not so much)
¼ cup salsa/pico (I use my recipe)

Optional Toppings
Fresh Cilantro
Sour Cream
Shredded Cheese
More Salsa
Tortilla Strips/Chips

In a huge slow cooker, soak beans night before according to package directions. In the morning drain and rinse (helps prevent a lot of excess gas.) Return beans to slow cooker. Saute onion and red pepper in a bit of butter/olive oil until tender. Add to slow cooker. Add everything except the cilantro and toppings. Cook all day on low (4 hours or so)
10 minutes before serving add cilantro. Cook for 10 min. Put in bowl, top as desired. Enjoy. Freeze leftovers if desired.

It’s a “wing it” recipe. Everyone has slightly different tastes, so some things are less appealing. Go with what your family likes.

Tuesday, January 27, 2009

Tostadas and Stuffed Jalapenos


Last night's supper was so delicious! You know it's good when you can't wait until everything is done to start munching. We made tostadas and stuffed jalapenos.
The stuffed jalapenos recipe (did I mention they are wrapped in bacon!!) came from The Pioneer Woman Cooks blog. They were quite delicious, but I still think they were missing something. So I may have to make up another batch and fool with it a bit.
The tostadas were leftover beef roast, sauteed onion & red pepper, portabello mushrooms, refried beans, black olives, Monterrey jack cheese, Colby cheese (for the boys,) greens, & my homemade salsa. Unfortunately it was canned tomatoes, as I couldn't get my hands on enough fresh ones, but it is quite delicious. I don't really use a recipe, I totally wing it, and it's always a touch different every time, but I'll leave a guideline style recipe in case you're interested.

Fresh & Yummy Salsa


  • 1 28oz can petite diced tomatoes; drained (I save the drainings for chili)

  • 1-2 diced up jalapenos (if you like spicy leave in some seeds and veins, otherwise get rid of the seeds and veins)

  • 1 small-medium onion diced (I prefer red usually, but I had a sweet onion and a red last night that I used)

  • Juice of one lime

  • salt (I use sea salt) & fresh crushed black pepper to taste

  • fresh cilantro (I use a good handful)

  • Dried cumin (I use about a big palm full)

  • Chili powder (not much, only about 1/2 to 1 teaspoon full)

Mix all together and let sit in the refrigerator for at least an hour. Eat


This salsa is perfect for chips or with tacos and such, but it doesn't always work very well in the casseroles that call for adding salsa. It's maybe more of a tomato filled pico than a salsa that you'd buy in the grocery stores in USA.


I hope you enjoy! I know we did!

Wednesday, January 21, 2009

Inauguration Celebration!

I didn't mean to not mention this before. We of course celebrated the Inauguration of the President yesterday! After all Lore has been sure of this for 4+ years now. He has been his biggest supporter.


Here he is standing like the Statue of Liberty

We all had special "Patriotic Punch."


The globs are soaked tapioca. I soaked the red ones in cherry syrup I made (with added food coloring,) and the blue ones are with blueberry syrup I made (again with food coloring.) Then we added some 7up.


The kids took turns "Cheersing" each other and making toasts.


Levi's toast to the new Prez was something to the effect of "Keep loving comic books and get our Troops home soon and safe!"

Liam's was something about "making school go later in the day (he likes to sleep in) get the homeless homes"

Lore's was pretty much "I knew it!!! He rocks! I rock! We all rock!!!"

It was tons of fun.

Tuesday, September 9, 2008

Terrible little blogger lately

Sorry, I don't know why, just plenty to do around the real world that I've needed to be online far less.


I had a request for my pink cookie recipe and thought maybe others would care to have it also. It is super easy since it comes from a cake mix. Which also means you can adapt it simply by grabbing a different flavor cake mix.
1 box cake mix (above is strawberry, my favorite is chocolate, but try anything!)
1/3 cup vegetable oil
2 eggs
Mix, drop by a small scoop onto an ungreased cookie sheet. Bake 375 F for 7-9 minutes or until puffed and almost no indentation remains when touched. Cool one minute on pan, remove from pan and cool completely on wire rack. Makes about 22-24 cookies
These make wonderful sandwich cookies. Above is filled with a delicious vanilla frosting I found here at the cupcake project I didn't have vanilla bean paste, so I just used my homemade vanilla extract instead, and I just winged it, I didn't measure. The cookies also taste great with icecream in the center!
Disclaimer: I know these cookies are not healthy or even the tastiest, but sometimes you need a quick and fairly yummy cookie. This is that recipe!
I have a few other things I hope to post soon, but I'm waiting for them to be received before I show pictures.
My current projects include another tea towel tour swap on craftster and Halloween costumes.
Lore is going to be the 10th Doctor from Doctor Who
Liam is going to be Mario
Levi is going to be Lego Indiana Jones
Yes, they all came up with their own ideas! I just have to make them happen.
Tim and I had a ton of ideas, but we haven't been able to lock one down, so it will more than likely be simple.

Wednesday, June 18, 2008

Funny Foods Contest


The boys were super excited to hear about the Funny Foods Contest at The Crafty Crow. They started coming up with ideas immediately. We made our first one today for lunch. It's a Stromboli Snail.

They love stromboli and always request to make them, so I wasn't really surprised when they picked it for the contest.

Basically you take pizza dough and roll it out. Then you layer your favorite fillings, for this one they used pepperoni, onion, black olives, and cheese. Then they rolled it up jelly roll style. Placed it seam side down on a baking sheet and brushed it with milk so the outside gets nice and brown.

Baked it at 350 for 20 minutes.

Then it gets sliced.

To make it like a snail, they laid a sliced piece on a bed of "grass" lettuce. Baby carrot was used for the head, string cheese for the antennae, black olive bits for the eyes.

A cut piece of string cheese and pepperoni were used for the little mushroom.

I was really impressed with how well they did this. All I did was put it in and out of the oven, (there have been burnt hands, so they are a little leery of this.) They did everything else, including taking the pictures!

Wednesday, March 12, 2008

Rainbows

My son's birthday is on Saturday, so we are pretty much obligated to bring a birthday snack to every event this week and next. I have been running out of things to bring. Most of them are healthy and fairly boring. Ants on a log (celery with peanut butter and raisins,) apples, oranges, carrots with hummus, etc... but you have to throw in a few fun ones once in awhile. So today for DI this is what he's bringing. It's rainbow finger jello. It takes way to long to make, but it is so easy you really don't do any thinking, so that way it sort of balances out.

There was a purple layer, but I let that one set up too long, so the blue jello didn't stick to it.

Here's the recipe if you're interested-


Rainbow Jello
For each layer you need;
one 6oz box or 2- 3oz boxes of flavored Jello/other brands gelatin
just under 1 cup of water or juice
1/4 cup cream

In a microwave safe measuring cup (like a pyrex) microwave 1 cup juice/water for 1 minute. Mix in 1st layer's jello, I used grape. Mix and mix until all granules are dissolved. Stir gently for another minute or so. Add 1/4 cup of cream. Mix gently. Put in a 9X13 inch glass pan. Place in refrigerator.
Immediately microwave second layer's water/juice. Repeat with second color jello (blue raspberry for me). Mix well, wait a minute or so and then mix in cream. See if jello has set in fridge, you want it to be tacky, but not wet (Mine set up too long so that's why you don't see any purple on my jello) Pour this layer on last layer.
Repeat with subsequent layers
Lime
Lemon (which I couldn't find, and didn't want to use pineapple, so I got this melon flavor which is light green, and I added yellow food coloring)
Orange
Strawberry

Let the whole thing set up for 4 hours or so, cut into squares. Dip bottom of pan in warm water for a second if you need help removing from pan.

Taste the rainbow.... ok I know that's skittles, but I couldn't help myself.

Wednesday, December 12, 2007

Quickie Spinach Supper

Well, I ended up having to go to the doctor today, so I didn't get everything I wanted to get done today, done. And I didn't get our planned supper in on time, so I had to come up with something. I didn't have much freezer stash left and none of it sounded appealing today, so I "winged" it. My husband hates when I do that, but the kids and I loved what came of it, and I'm quite sure my hubby will too when he gets home. I'm documenting it, so if I ever want it again, I can recreate it.

Quickie Spinach Pasta Supper
3 TBS Olive Oil
1 chopped onion
2 cloves of garlic (or to taste)
1 TBS Butter
1 tub of ricotta cheese (I think mine was part skim)
1/2 brick of cream cheese
1 thawed and squeezed frozen spinach box
2-3 shakes of ground cayenne pepper
2 shakes of nutmeg
Lots of fresh ground black pepper
salt
Leftover pasta ( I had fettuccine)

Saute onion in olive oil until translucent. Add butter and garlic, cook that for a little bit. Toss in spinach, ricotta, cayenne, black pepper, salt, and cream cheese. Smash and cook that until it is all mixed and creamy. Add cooked pasta. If it's too thick thin with a bit of milk.

This was so good, and like I said, my kids loved it. If I were to change anything, I would have loved to add some fresh mushrooms, but we didn't have any.
We ate it with a salad and those pillsbury crescent rolls that are garlic flavored. I'm sure they are really really bad for you, but they taste oh, so, good!

Monday, December 10, 2007

Favorite Cream Cheese Recipes

Crazy Hip Blog Mamas Recipe Rally is Cream Cheese Recipes. I do love cream cheese, but my 2 favorite recipes are super simple and and really yummy.
The first is my eldest son's favorite! He loves green olives. It's almost a sickness for him. He just can't get enough. Plus the white, red and green make it perfect for the holiday season.
The second one is I think a staple for a lot of families at get togethers, but all are made a little differently.

Green Olive Dip
Brick of cream cheese softened
a handful of green salad olives chopped (more or less to taste)
dash or so of Worcestershire sauce
a bit of minced garlic or garlic powder ( to taste)
a few tablespoons of sour cream (optional, but it helps the chips/crackers not break as easily)

Mix together, chill, serve with chips or crackers or vegetables. (My mom's favorite is with potato chips, my husband's favorite is with triscuit crackers, my favorite is with celery [yes, honestly] and my eldest son's favorite is with his finger!)

Taco Dip
2 bricks of cream cheese softened
1/4-1/2 cup of sour cream (optional but helps to prevent broken chips)
1 packet of dry taco seasoning (I make my own, so I couldn't tell you what brand to buy)
chopped/sliced toppings of choice I like;
green onion
tomato
lettuce
black olive
shredded cheese

Mix the first 3 ingredients well. Spread over a platter. Layer topping ingredients (I usually do the very top layer cheese then garnish with a few extra black olives and green onions.) Chill until serving.
I serve with tortilla chips. This makes quite a bit, you could make a smaller batch, but I usually make this for a party, then I have to make another for home, because my husband insists he never gets any at the party.

Tuesday, July 24, 2007

Fav Chips N Dips Recipe Rally

I know I have a lot of posting to catch up on, but I saw they were having a recipe rally for chips and dips at Crazy Hip Blog Mamas and I had to share ours.

Beyond easy, but very tasty!

1 can hormel chili (whatever kind you like, we usually go with regular with beans, but also enjoy vegetarian when my sister-in-law and niece are around. Darn ulcers I must stay away from the hot)
1 brick cream cheese (go lowfat or whatever if it floats your boat.)
1/4 cup prepared salsa
Handful or two of cheese (your choice, we usually do colby-jack)

Now you can make this 2 different ways for 2 different enjoyment levels. Sometimes we put it in layers on a plate/shallow dish.
Then I spread cream cheese first, cover with salsa, then chili, then cheese. Then you bake/microwave it until it is melted and bubbly.

If we are going to a pot luck or having people over and we want it to stay warm longer, we throw everything into the crockpot and mix it up.

Serve with tortilla chips. Sometimes we like to garnish with black olives and/or chopped green onion and tomatoes.